Saturday, November 7, 2015

8 Star Ripple Pot Holder/Trivet


I have made several ripple afghans and really like them. I was looking through patterns for pot holders and didn't see any for ripple stitch ones that were quite what I had in mind. So, I adapted what I have done on the ripple afghans and this pattern is what I came up with. I really like the look, and since they are made with two layers they provide a lot of protection for my table and counter top. I hope that you like them and if you have any questions on the pattern please let me know and I will see if I can help.

Materials:
Worsted Weight cotton yarn in your choice of color or colors.
“G” Crochet Hook
Tapestry Needle for weaving in ends
Notes: 
This can be made all in one color, with a different color for each row or your choice. The back and the front can be made the same or you can use different colors on each side. Just remember that the joining round color will show on both sides.
Starting with round three the dc count will increase by 16 each row and the ones you count are the ones between the fpdc and the shell.
Special Stitches:
Single Crochet Shell- (2sc, ch2, 2sc)
Shell- (2dc, ch2, 2dc) in specified space or stitch.
V-St- (dc, ch2, dc) in specified space or stitch.
Fpdc-Front post double crochet
Fpsc-Front post single crochet

Directions:
Rnd 1: Ch4, join with sl st in first chain. Chain 3, counts as first dc and ch1. (dc, ch1)7 times. Sl st in top of beginning ch3.(8 dc, 8 ch1 spaces)
Rnd 2: Fpdc around post below sl join, (V-st in next ch1 sp, fpdc around next dc) 7 times, V-st in next ch1 sp, sl st in top of beginning fpdc. (8 fpdc, 8 V-st Shells)
Rnd 3: Fpdc around post below sl join, (skip next dc, shell in next ch2 sp, skip next dc, fpdc around next dc) 7 times. Skip next dc, shell in next ch2 sp, sl st in top of beginning fpdc. (8 shells, 8 fpdc)
Rnd 4: Fpdc around post below sl join, (skip next dc, dc in next dc, shell in next ch2 sp, dc in next dc, skip next dc, fpdc around next dc) 7 times. Skip next dc, dc in next dc, shell in next ch2 sp, dc in next dc, sl st in top of beginning fpdc. (8 shells, 16 dc, 8 fpdc)
Rnd 5: Fpdc around post below sl join, (skip next dc, dc in next 2 dc, shell in next ch2 sp, dc in next 2 dc, skip next dc, fpdc around next dc) 7 times. Skip next dc, dc in next 2 dc, shell in next ch2 sp, dc in next 2 dc, sl st in top of beginning fpdc. (8 shells, 32 dc, 8 fpdc)
Rnd 6: Fpdc around post below sl join, (skip next dc, dc in next 3 dc, shell in ch2 sp, dc in next 3 dc, skip next dc, fpdc around next dc) 7 times. Skip next dc, dc in next 3 dc, shell in next ch2 sp, dc in next 3 dc, sl st in top of beginning fpdc. (8 Shells, 48dc, 8 fpdc)
Rnd 7: Fpsc around post below sl join, (skip next dc, sc in next 4 dc, single crochet shell in ch2 sp, sc in next 4 dc, skip next dc, fpsc around next dc) 7 times. Skip next dc, sc in next 4 dc, single crochet shell in next ch2 sp, sc in next 4 dc, sl st in top of beginning fpsc. 

Finish off and weave in ends leaving the tail from your beginning circle loose (you will be tying this to the other side when joining.)
Make another using the same pattern. You can use the same colors or different color if you choose. Just note that the joining round color will show on both sides.
Before doing joining round, place wrong sides together and tie the tails from the first round (where you chained four and joined into a circle) of front and back together. This holds the center together so it doesn’t shift and it makes your beginning circle secure so it won’t come open when the pot holder is washed.
Joining Round: Join with sl st in the stitch above any fpsc stitch. Ch1, sc in each stitch around going through front and back pieces matching up stitches doing 2 sc in each ch2 space of each shell. Finish off and weave in ends.
Enjoy, and enjoy the food from the pots and casseroles you will sit on them!

Friday, September 18, 2015

Snowman Jar Cozy with Hat Lid


Since fall is just around the corner my thoughts for new crochet projects naturally turned to the holidays and what I had made up in the past. This little snowman jar cozy was one of my favorite quick projects. I filled them with Christmas candy and gave them to my family members and friends last year. They seemed to really like them. This shows up on pinterest often but I changed it up a little and made a lid for it that looks like a snowman's black hat. It's very easy to make, and as I said works up quickly, so you might want to consider it for your holidays. They don't have to be filled with candy of course, but hey, that could be a lot of the reason everyone liked them!

The jar cozy was from a basic pattern I found online. I changed it only slightly. The basic pattern is at: 
http://whiskersandwool.blogspot.com/2012/12/snowman-jar-cozy-crochet-version.html

Materials:
I used an H hook 
Small amount of white worsted weight
Small amount of black worsted weight
Small amounts of red and black felt
Glue
The jar I used was one I picked up at Dollar Tree and was about 5 ½ inches high with a ruffled top and about 15 inches around.

Pattern:
Ch 23.
Row 1: Turn and sc in 2nd chain from hook. Sc in each stitch across. (22 stitches) , Ch 1 Turn
Row 2: Sc in back loop across on each row, ch 1 and turn for a total 41 to 46 rows. (Check to see if stretches to fit around jar)
After last row join to starting row with single crochets. Tie off at bottom and weave in ends.

The eyes, nose and mouth I made by cutting circles out of left over fleece and gluing in place.

Hat:
To make the hat I just used a basic hat type design. I made it so the top circle was just a smidgen bigger around than the opening so it would slip over the top. I’m not a pattern writer so hope these directions make sense:

Ch 4, join with slip st to form circle
Row 1: Ch 3, dc 11 stitches in circle, join with sl in top of ch (12 stitches) 
Row 2: Ch 2, dc in same st as ch, 2, dc in each stitch around, join with sl to top of ch 2 (24 stitches)
Row 3: Ch 2, *dc in next stitch, 2 dc in nest* repeat from * around, join with sl to top of ch 2 (36 stitches)
Row 4: Ch 2, *dc in next 2 stitches, 2 dc in next* repeat from * around, join with sl to top of ch 2 (48 stitches)
Row 5: Ch 1, sc in back loop of each stitch around, join with sl to top of ch 2 (48 stitches)
Row 6: Ch 2, dc around (48 stitches)
Repeat above row until hat is as tall as you want. I did 4 additional rows. You can make it as high or as short a hat as you want. Finish off.

Fold up last row of dcs to form a small brim.

Ch 15, leaving a long tail at beginning and end. I threaded the tail through the top of the hat and tied on the inside to make a loop to lift the lid.

Should you have any problems with the pattern or any questions please let me know. Enjoy.

Thursday, June 25, 2015

Crochet Shoulder Wrap

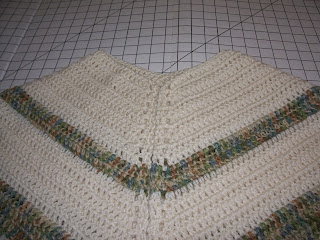
Shoulder Wrap - Free Pattern. The shape helps keep it on the shoulders where many elderly and chemo patients get cold. Being open down the front makes it easy for medical personnel to access arms for blood pressure readings and makes it great for those receiving chemo or medical treatments.

Shoulder Wrap - Free Pattern. The shape helps keep it on the shoulders where many elderly and chemo patients get cold. Being open down the front makes it easy for medical personnel to access arms for blood pressure readings and makes it great for those receiving chemo or medical treatments.


This shoulder wrap pattern was adapted slightly from a pattern by Susan A. Coes. See her pattern at: crochetme.com    I thank her for the great pattern! The main changes I made in the pattern were to include the stitches for making the pattern larger.
Introduction:
This little wrap was designed specifically for the elderly - particularly those confined to wheelchairs or to bed. The short length prevents it from getting caught in wheels. The shape helps keep it on the shoulders where many elderly get cold (as do those receiving chemo treatments). Being open down the front makes it easy for medical personnel to access arms for blood pressure readings and makes it great for those receiving chemo or medical treatments.
Materials List:
12 ounces of worsted weight yarn
H hook (or an I hook if you crochet tightly)
Finished Size:
Approximately 18 inches long (down the center back) and approximately 80 inches around the bottom edge. Larger size is shown in ( ).
Gauge:
14 dc = 4 inches
8 rows = 4 inches
Notes:
V stitch = 1dc, ch1, 1dc
The Pattern:
Chain 54 (62)
Row 1: dc in 3rd ch from hook, ch 1, 2 dc in next ch, *dc in next 11 (13) ch, v st in next ch, repeat from * 2 times, dc in next 11 (13) ch, 2 dc in next ch, ch 1, 1 dc in each of last 2 ch, ch 2, turn (58) (66) dc and 5 ch 1 spaces)
Row 2: dc in next dc, ch 1, 2 dc in next dc, *dc in next 13 (15) dc, V st in ch1 space, repeat from * 2 times, dc in next 13 (15) dc, 2 dc in next dc, ch 1, dc in last dc and in top of turning ch, ch2, turn (8 sts increased).
Rows 3 - 28: repeat row 2, following established pattern, always increasing the number of dc between V sts by 2 (each row increases by a total of 8 sts).
Row 29: dc in next dc, ch 1, skip ch 1 space, dc in next dc, *ch 1, skip 1 dc and dc in next st, repeat from * to V st in previous row, ch 1, V st in ch 1 space of V st, ch 1, skip next dc, dc in next dc repeat from * across row to last dc. Ch 1, skip ch 1 space, dc in next dc, dc in last dc and in top of turning ch, ch 2, turn
Row 30: dc in each dc and ch 1 space across to V stitch in previous row. V stitch over V stitch. Repeat across bottom. End off, weave in ends.

Tuesday, June 23, 2015

Shoulder Wrap - Great for Seniors and Chemo Patients


Shoulder Wrap - Free Pattern. Great for seniors and those going through chemo and who are always chilly. They drape the shoulders and stay in place well.

Shoulder Wrap - Free Pattern. Great for seniors and those going through chemo and who are always chilly. They drape the shoulders and stay in place well.


I have a dear friend who is going through chemo treatments. They have been going well and we are all hopeful. When she saw some shoulder wraps I had made for the local care center she said they would be great when getting chemo treatments as they always have blankets but that the blankets don’t cover the shoulders and the air in the treatment lab is always chilly. Also they would make it easy for the nurses to check the IV. I made one for her and when she wore it to her treatment she received lots of comments about it and had other patients asking where she had gotten it.

Since I really enjoy crocheting and love it if I can make things that people find useful and that can bring some comfort to someone, my ears perked up. I got busy and made up 8 and took them to the cancer center. They were immediately given out and others started asking for the pattern or where they could get one. Since then I have made more and have given out the pattern to others.

I liked the stitch on this pattern and have used it for lots of the wraps. I adapted the pattern slightly from:
stitcheryprojects.com/2014/04/03/little-checks-wrap/  
I really thank her for the great pattern!!

Here is the pattern:

The example is made in worsted weight acrylic yarn

Size: The sample is 18-½” from neck to edge. The bottom of each of the four panels is 26-½” wide. Size can be increased or decreased by changing hook size. The longer the wrap is made the bigger around it gets so it is easy to make the width and length you need.

Materials:
14.7 oz/937 yds worsted weight yarn
Size H (5mm) crochet hook (I use an I hook and I crochet loosely)

Abbreviations:
ch = chain
ch sp = chain space
dc = double crochet
shell = 2 dc, 1 ch, 2 dc in chain space indicated

Instructions:
Make all stitches in both loops

Chain 50

Row 1: Dc in 3rd ch from hook,  2 dc in next ch, dc in each of next 8 ch, (2
dc in next ch, dc in next ch, 2 dc in next ch, dc in each of next 8 ch) three times, 2 dc in next ch, dc in each of last 2 ch, Ch 3, turn.

Row 2: Shell in 4th dc, ** (skip 2 dc, 2 dc in space between dc) five times, skip 2 dc, shell in next dc. Repeat from ** three more times, skip 2 dc, dc in last dc. Ch 3, turn.

Row 3: Shell in next shell, ** 2 dc in each space between previous row’s 2 dc sets across to the next shell, shell in the shell. Repeat from ** across the row, dc in the top of the turning chain. Ch 3, turn.

On all following rows you will be working 2 dc in spaces between previous 2 dc sets
and a shell in the center of each shell. 2 dc sets will increase by 1 set in each panel between shells..

Repeat row 3 until wrap is desired size, then finish off with the last row given below. The sample has 37 rows, including the last row.

Last Row: Dc in 2nd and 3rd dc, 3 dc in ch-1 sp, (dc in each dc across to next ch-1 sp, 3 dc in ch-1 sp) four times, dc in each of last two dc, dc in turning chain.

Finish off and weave in end.

The wrap can be made in a solid color or can be made with any number of color changes. The best way to make a color change is to finish all but the very last pull through of the two loops of the last stitch of a row. Cut yarn with a few inches of tail and join with new color next to stitch. Pull new color through last two loops. Weave in ends.


Tuesday, March 31, 2015

Ribbed Crocheted Hat

Ribbed Crocheted Hat


I love this pattern.  I have tried several other patterns and keep returning to this one.  Plus since it has no openwork, it might be a warmer hat.   I get to use lots of scrap wool and change up the rows for interest. I found this pattern on a site on the internet but the site no longer exists and I have not been able to find the pattern elsewhere. If you know where the pattern came from I would be happy to give credit here as it is a great pattern!

Poster of pattern stated “I got this pattern from my 94 year old aunt.  She has made over 1000 of these during the past few years and donated them to shelters, and women's prisons.” I make them in kids sizes and donate them to the local coats for kids campaign so they can give them out with the coats.  

Here is the pattern:

I use a J hook when I want to make it for a size that fits my own head. You can use a smaller hook and thinner yarn to make for a smaller size. While I have a pattern I tend to improvise a bit with different wool and different size hooks. This pattern calls for one color. When I do it, like the picture, I use a different color here and there to make it more interesting.

Round 1, chain 4, slip stitch in first chain to form a ring. Chain 3 (this counts as a double crochet) then 11 dc in ring, join with sl st in top of chain 3 (so 12 dc made).

Round 2, (Chain 3, 2 dc) in first stitch, dc front post (fp) around the next stitch, (3 dc in next st, fp around next st) around, join. (24 stitches)

Round 3 (Chain 3, dc) in first st, fp around next st, (2 dc in next st, fp around next st) around, join (36 sts)

Round 4: (Chain 3, dc) in first st, dc in next st, fp around next st, (2 dc in next st, dc in next st, fp around next st) around, join. (48 sts)

Round 5-12: Chain 3, dc in next 2 stitches, fp around next st, (dc in next 3 sts, fp around next st) around, join. At end of last round, fasten off.

( I don't necessarily do 12 rows. I do as many as looks good or feels good on my head. Also.... I like to do a single crochet around the end for my last row.)

You can put a pom pom on the top, or put a crochet flower on the side, or just do different colors for every few rows, etc....this basic hat style can be changed any number of ways.

Thursday, January 1, 2015

Tissue Box Cover


Tissue Cover

This tissue box cover is my adaptation of a design by Judy Nelson which I found on Annie’s Crafts. It works up quickly and easily and can be made in a solid color or in stripes and would no doubt be pretty in a variety of colors. All of the covers in the above picture used the same pattern - the only difference is the colors I used on each row. The tissue boxes I covered were a standard 9x5x3 ½ but the pattern can easily be adjusted to fit about any size box once you have the basic pattern down.

To Print or Download this Pattern:
To print this pattern click on the “Print & PDF” button at the very end of this post. It also gives you the option of making a PDF to download. (If you do not see the button then click on the name of the post at the top and it will take you to the page for just that pattern - the button should be at the bottom of that page)

I have NO experience writing patterns so if you have questions or find something that won’t work or that I have made a mistake on please let me know so I can correct it. I appreciate your help and suggestions!

Materials:
Less than 1 skein of worsted weight yarn (I used scrap yarn I had handy so can’t give an exact amount)
Size H crochet hook

Basic Stitches:
Ch, sl st, sc, dc

Row 1: Beginning at top ch 29, sc in second chain from hook, dc in next chain, (sc in next ch, dc in next ch) across, turn. (28 stitches)

Row 2-6: Ch 1, sc in first dc, dc in next sc, (sc in next dc, dc in next sc) across, turn.

Row 7: Ch 1, sc in first dc, dc in next sc, (sc in next dc, dc in next sc) 2 times. For opening chain 16, skip next 16 stitches, (sc in next dc, dc in next sc) across remainder of row, turn. (28 stitches and chains)

Row 8: Working in stitches and chains, ch 1, sc in first dc, dc in next sc, (sc in next dc, dc in next sc) 2 times, (dc in next ch, sc in next ch,) 8 times, (sc in next dc, dc in next sc) across remainder of row, turn. (28 stitches)

Row 9-13: Ch 1, sc in first dc, dc in next sc, (sc in next dc, dc in next sc) across. At end of row do not turn.

Row 14: Working around outer edge, in end of rows and in stitches, Ch 1, sc in each end of row, 12 stitches across the short end. Working on opposite side of starting chain 3 sc in starting ch, sc in each stitch across, 3 sc in corner, sc in each end of row, 3 sc in corner, sc in each stitch. Join in first ch 1. Do not turn.

Row 15: Ch 1, working in back loops only, (sc in next stitch, dc in next stitch) around, join and turn.

**Note: At this point I worked 2 more rows of my main color around (as shown in rows 16-24 below) and then alternated colors for a stripe or added several rows of a different color for a wider stripe. The choice is up to you if you want stripes, and to your preferences.

Row 16-24: Ch 1, (sc in next stitch, dc in next stitch) around, join and turn. At the end of row 24 do not turn.

**Note: At this point you need to measure to make sure that the sides of your cover are the same height as the box you will be covering. I have found that all boxes are not the same so this is the point to add rows if you need more height or remove rows if sides will be to long.

Row 25: Ch 1, sc in each stitch around, join and fasten off.

Row 26: For Edging: With top facing away from you, join with a sl st in any front loop of round 14, sl st loosely in each stitch around, join with a sl st in first stitch, fasten off.


Flower:
Ch 4

Row 1: Ch 4, sl st in 3rd ch from hook to join. Ch 1, sc 11 in center of ring. Join with sl st in ch 1.

Row 2: Ch 8, sl st in same ch as join. Sl st to next sc, ch 8, sl st in same sc. Repeat around circle of all 12 sc. (12 petals)

You can make the flower larger or smaller by doing more or less chains for the petals.